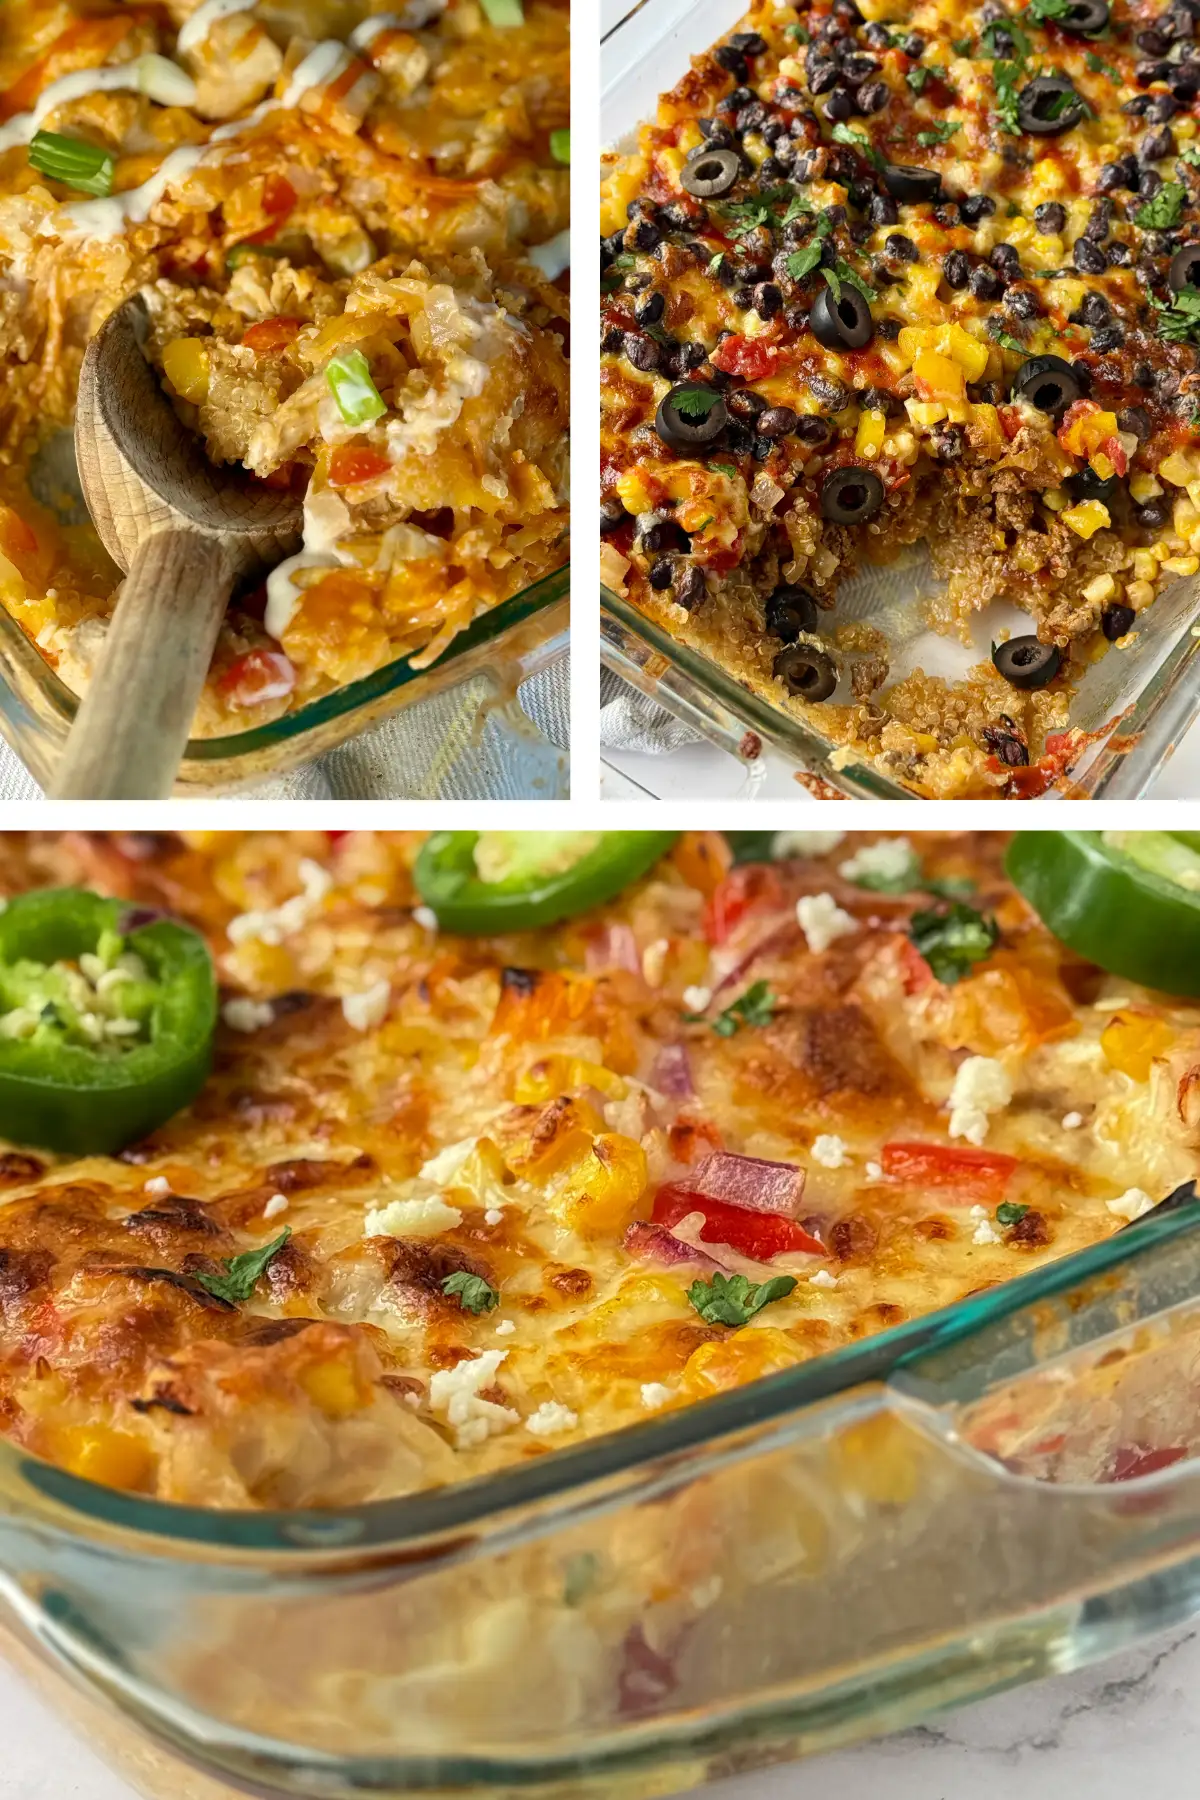
6 dietitian-created casseroles you need in your weekly rotation. These are the kind of easy dinners that check every box: quick, comforting, and actually nutritious. As a mom of two, I know how often dinner feels like the part of the day we all dread – so I’ve been on a serious casserole kick lately. Most of these are true dump-and-bake meals and make amazing leftovers, too.
With minimal effort and few dishes, you will have a hearty dinner on the table with leftovers for lunch the next day.
Dietitian tip: cooked and cooled rice increases the resistant starch content, which lowers the glycemic response and boosts gut-friendly fiber. Translation: leftovers are even better for you!


Why These Casseroles are the Best
- These are not your typical “open a can of cream soup” casseroles.
- Most of these recipes utilize pantry staples + frozen foods for convenience + fresh ingredients, too.
- It’s healthy meets comfort food meets nutrition.
- Each recipe has a good balance of protein and fiber.
- Yes, they take time in the oven, but the hands-on prep time is minimal.
This post contains Amazon affiliate links. At no additional cost to you, I receive a small compensation if a purchase is made.
The Recipes
These casseroles are customizable – feel free to click on the link to see the entire recipe + nutrition + variation ideas. Just a note: four out of five of these recipes use chicken. The Mexican version utilizes ground beef or turkey.
1. Buffalo Chicken Quinoa Casserole
This first casserole combines the classic buffalo chicken flavors with superfood quinoa. Quinoa is rich in antioxidants while also being considered a ‘complete protein’. It’s creamy, spicy and very satisfying. {Gluten-Free}

Recipe makes about 5 servings with 384 calories and 34 grams of protein per serving. Prep everything ahead of time, except the buffalo sauce mixture, up to 24 hours in advance.
Ingredients
- 1 cup of uncooked quinoa – pre-rinsed for convenience. If you don’t have a sieve to rinse quinoa, I would recommend an already pre-rinsed quinoa like Bob’s Red Mill Organic.
- 1 1/2 pounds of raw, skinless, boneless chicken breast or about 3.5-4 cups of cooked chicken breast. I typically partially cook the chicken before adding to the casserole. Cooked chicken can be used, too!
- 1/2 cup buffalo sauce. I used Kinder’s Buttery Buffalo Sauce and I highly recommend for this recipe. It is lower in sodium than many other sauces, too.
- 1 cup of water or low sodium chicken broth.
- 1/2 cup of plain Greek yogurt.
- 1 cup of shredded carrots.
- 2 bell peppers, diced small. I like to use yellow and red to add some color.
- 1 white onion, diced small – optional, or you can just top with green onions.
- 8 ounces of sharp cheddar or Colby Jack cheese
- Garlic powder, one teaspoon.
- Onion powder, one teaspoon.
- Green onions, optional, for topping
- Bleu cheese, optional, for topping.
Directions
- Preheat oven to 400°F.
- Partially cook chicken: While the oven preheats, air fry or sauté chicken for about 10–12 minutes until mostly cooked, then dice into small pieces. (You can also use cooked or even raw chicken — just ensure it reaches 165°F by the end of baking.)
- Prep veggies: Finely dice onion and bell peppers. If needed, rinse quinoa using a fine mesh sieve (or start with pre-rinsed quinoa to save time).
- Assemble casserole: Add quinoa to the bottom of a 9×13-inch glass baking dish. Layer on the diced vegetables and chicken.
- Make sauce: In a small bowl, whisk together buffalo sauce, Greek yogurt, garlic powder, onion powder and broth (or water) until smooth.
- Combine: Pour sauce evenly over the casserole, making sure everything is coated. Sprinkle with half the cheese.
- Bake covered: Cover tightly with foil and bake for 60 minutes.
- Uncover + finish: Remove foil, top with remaining cheese, and bake uncovered for another 10 minutes, until bubbly and golden.
- Rest + serve: Let stand for 10 minutes before serving. Drizzle with extra buffalo sauce, ranch, or sprinkle with green onions or bleu cheese if desired.
For the full recipe + nutritional information + tips for success, CLICK HERE.
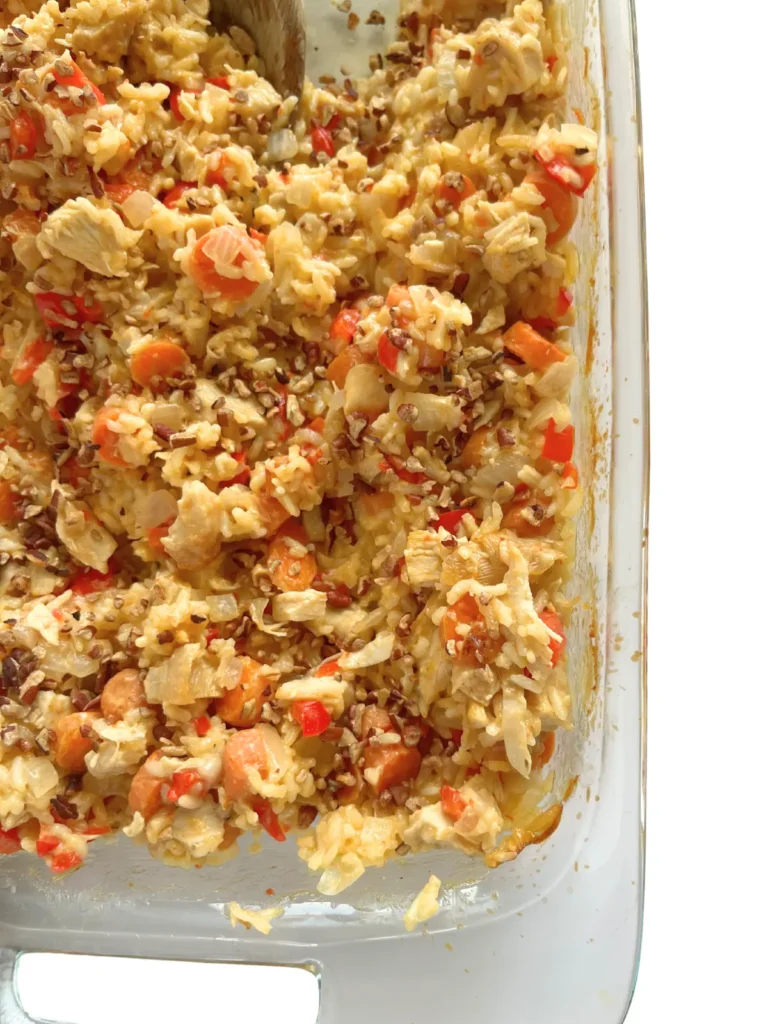
2. Coconut Chicken and Rice Casserole
Compared to some of these other casserole, this creamy coconut milk and chili sauce casserole utilizes mostly healthy (ish) convenience products plus carrots and bell peppers for freshness. It’s surprisingly delicious – slightly sweet and spicy! Gluten AND dairy-free.
This recipe makes 6 generous servings. Minimal prep and then the oven does the rest of the work for you! Prep ahead without the coconut milk mixture up to 24 hours in advance.
Ingredients
- Full Fat Coconut Milk (2 1/2 cups). I used about one and a half cans of coconut milk – and will save the rest for another recipe.
- Thai Sweet Chili Sauce (3/4 cup). I highly recommend Mae Ploy Sweet Chili Sauce – this is the best I’ve tasted in terms of flavor. Use only a 1/2 cup for a more mild flavor. Top the end result with more sauce or sriracha if you prefer more spice.
- Uncooked parboiled long-grain rice (1 cup). The rice cooks up perfectly in the oven!
- Boneless, Skinless Chicken Breast, Cooked and Diced (1 1/2 lbs. or about 4 cups). Use rotisserie chicken or batch cook chicken in advance to save time!
- White Onion, Diced (One large onion).
- Red and/or Yellow Bell Peppers, Diced Small (2).
- Carrots, Diced Small (about 1 1/2 cups). I am all about a veggie-packed dinner and I feel like carrots and peppers work well with this dish. Cauliflower, snow peas, or broccoli might be good options. Feel free to omit or serve this recipe with a side of green beans.
- Chopped Pecans, Optional. I like to add 1-2 tablespoons of chopped pecans which adds some nice texture and crunch!
- Garlic Powder (1 teaspoon). Sub with 4-5 cloves of garlic, minced.
- Salt and Pepper (1/2 teaspoon each or to taste).
Directions
- Preheat oven to 400°F.
- Add one cup of uncooked rice to the bottom of a 9 x 13-inch baking dish.
- Add diced chicken, onion, bell pepper, and carrots to the baking dish.
- In a separate bowl, combine coconut milk, Thai sweet chili sauce, garlic or garlic powder, salt and pepper. Whisk to combine.
- Pour the sauce mixture into the casserole dish. Stir to combine all the ingredients together and spread evenly throughout the pan.
- Cover the baking dish with aluminum foil and bake for about 60-75 minutes. Cooking time will vary depending on the oven. Mine took about 70 minutes – I checked it at about 60 minutes and put it back in uncovered.
- Remove from the oven and let cool for 5-10 minutes. Top with chopped pecans (optional), and enjoy! Store in an airtight container in the fridge for up to 4 days from when the chicken was cooked or in the freezer for up to 3 months. Dare I say it’s even better as leftovers?
For the full recipe + nutritional information + tips for success, CLICK HERE.
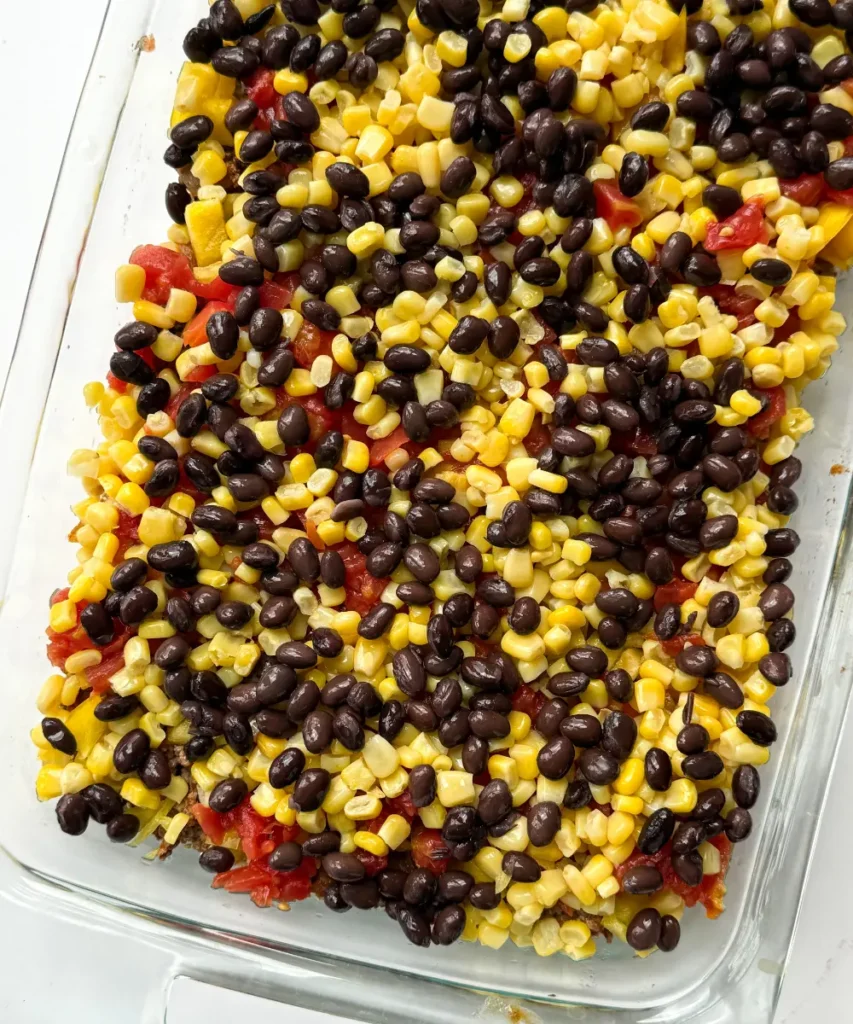
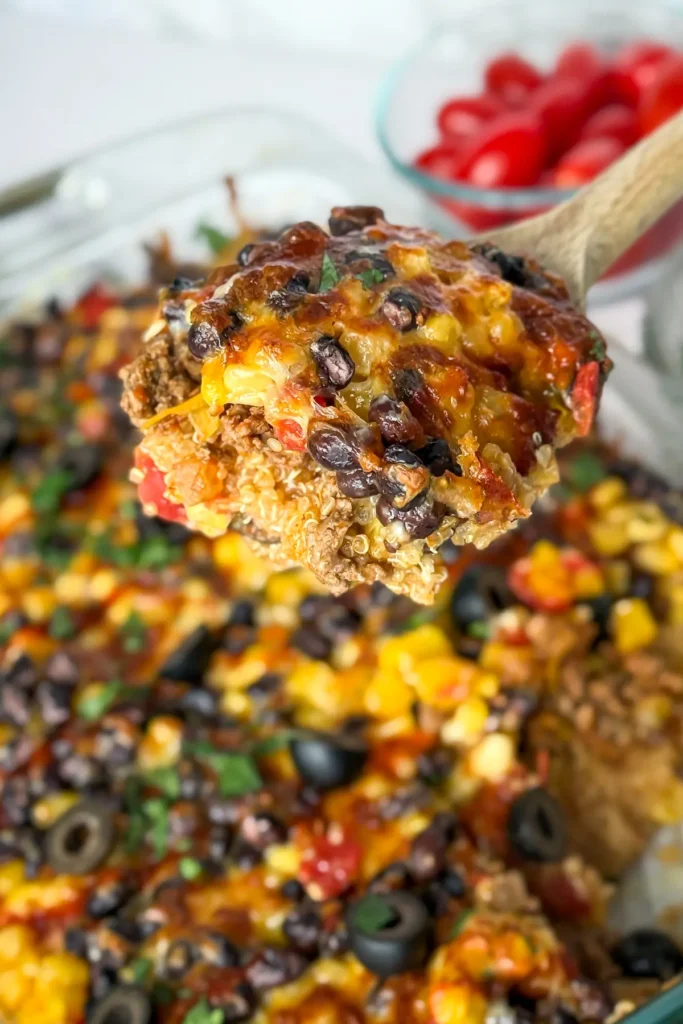
3. Mexican Quinoa Casserole
A taco or burrito-inspired one pan meal but with quinoa. It’s filling with a great balance of both protein and fiber. Plus, easily customizable with different toppings like most Mexican-inspired dishes are. {Gluten-Free}

The only downside to this casserole is that the ground beef needs to be already cooked before baking. To save some time, I often thaw already cooked beef that I have frozen for convenience OR cook the beef 12-24 hours earlier for those busier nights.
Ingredients
- 1 lb lean ground beef or ground turkey. I used 90/10 ground beef and I have used turkey!
- 1 cup raw quinoa, rinsed; or buy pre-rinsed quinoa for convenience!
- 1.5 cups of black beans, drained and rinsed.
- 1 (14.5 oz) can diced tomatoes, undrained. I used Ro-Tel tomatoes with chilies.
- 1 (14.5 oz) can of (drained) corn. Or, about 2 cups of frozen corn.
- 1 bell pepper, diced small.
- 1/2-1 large onion, diced small.
- 1 ½ cups low-sodium chicken or beef broth
- 1/2-1 packet taco seasoning (or use 1 Tbsp chili powder, 1 tsp cumin, ½ tsp paprika, ½ tsp garlic powder, and ½ tsp salt)
- 1-2 chipotle peppers in adobo sauce, optional.
- 1 cup shredded cheese, plus more if preferred.
- Optional toppings: avocado, cilantro, Greek yogurt or sour cream, salsa, green onions, hot sauce, or whatever store-bought sauce you want to drizzole on top!
Directions
- Preheat oven to 400°F.
- Cook the meat: Heat a large skillet over medium heat. Add the ground beef or turkey plus the diced onion and cook until browned, breaking it apart as it cooks. Drain excess fat (optional). Stir in diced chipotle peppers in adobo sauce and taco seasoning. Break up the adobo peppers with spoon.
- Assemble the casserole: In a 9×13-inch casserole dish, spread out one cup of raw & rinsed quinoa. Then, layer the cooked meat, bell peppers, black beans, tomatoes, corn, and broth.
- Bake: Cover tightly with foil and bake for 40 minutes. Remove foil, then sprinkle with cheese and bake uncovered for an additional 10 minutes. Then, broil on high for about two minutes to get the crustly cheesy topping!
- Rest and serve: Let the casserole rest for 5–10 minutes before serving – this helps it thicken and set.
- Top with your favorite toppings – avocado, cilantro, salsa, and/or a dollop of Greek yogurt.
For the full recipe + nutritional information + tips for success, CLICK HERE. This one has 35.8 grams of protein and 12.6 grams of fiber!
4. Chicken Fried Rice Casserole
This is THE ultimate dump everything in and bake casserole. It is a, for the most part, healthier version of hibachi fried rice but still so delicious. The shelled edamame adds some plant-based protein and fiber. {Gluten-Free & Dairy-Free}
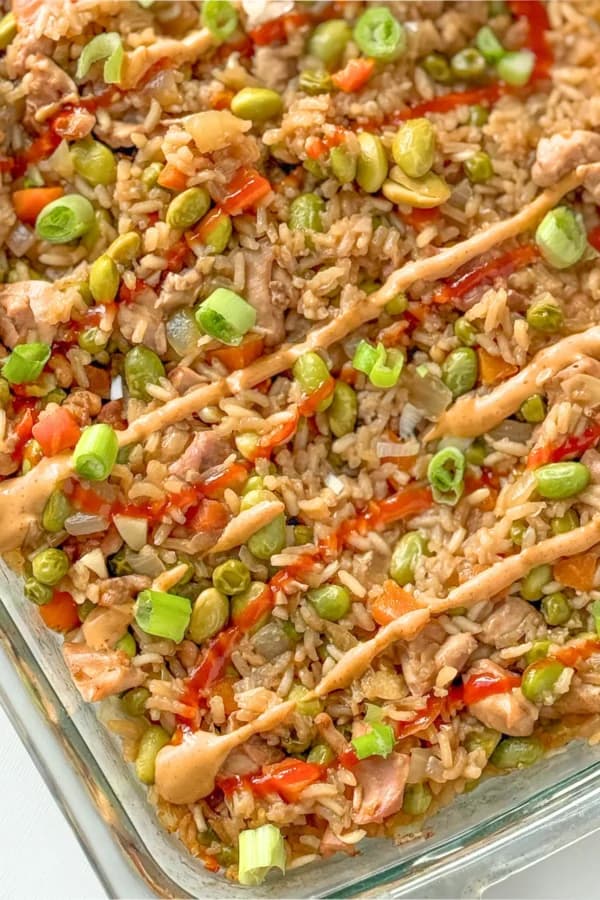
This casserole makes about 5 servings! The smell of this casserole baking was amazing – my whole house filled with that delicious garlic aroma (my Italian heart was very happy).
Ingredients
- 1 cup uncooked long grain white rice.
- 1 lb chicken breast or thighs, raw, diced into small ½-inch pieces.
- 1½ cups frozen mixed veggies (peas, carrots, and/or corn). I used a frozen carrots and peas mixture.
- 1 medium diced onion.
- 1 1/2 cups of frozen and shelled edamame. This is also known as mukimame.
- 2½ cups low-sodium chicken broth.
- ⅓ cup low-sodium soy sauce. Read ingredient label to ensure it is gluten-free, if preferred.
- 1 tbsp rice vinegar.
- 4-5 garlic cloves, minced. I used 5 large cloves!
- Optional topping ideas: avocado slices, sriracha, sriracha mayo, yum yum sauce, bang bang sauce, green onions, sesame seeds, chopped nuts, scrambled eggs, drizzle of sesame oil.
- 1/4 teaspoon of salt, also optional! If you are topping your casserole with sriracha and/or any other sauces, it might be too salty with this additional salt.
Directions
- Preheat oven to 400°F.
- Add everything to casserole dish in layers: uncooked rice, diced onion, raw chicken (diced), and frozen veggies (minus the edamame). Spread evenly.
- In a bowl, whisk together the soy sauce, chicken broth, rice vinegar, and minced garlic.
- Pour the liquid mixture over the rice/chicken.
- Cover tightly with foil and bake 60 minutes.
- Remove foil, add in edamame, stir gently, and bake 10–15 more minutes or until rice is tender, liquid is absorbed and the chicken is fully cooked.
- Let casserole rest for 10 minutes after baking. This allows the casserole to set.
- Top with sliced green onions + a drizzle of sriracha or preferred sauces. I like to add sliced avocado on the day of consumption.
For the full recipe + nutritional information + tips for success, CLICK HERE.
5. Street Corn Casserole
Then, there is this super satisfying street corn-inspired chicken and rice casserole. This casserole takes all the bold, creamy, tangy flavors of Mexican street corn and turns them into a truly effortless, one-pan dinner.
Stirring in Greek yogurt at the end adds a creamy, tangy finish that balances the sweetness of the corn and the richness of the cheese. {Gluten-Free}

Prep this casserole ahead of time, without the broth mixture. When ready to cook, just pour the broth mixture over the casserole and follow steps 6-9! This recipe makes 6 servings with 33g of protein per serving.
Ingredients
- Boneless, skinless chicken breasts or thighs, about 1-1.5 pounds, diced and cubed.
- 1 1/2 cups enriched long-grain rice.
- 1 cup plain Greek yogurt (or mayo for classic street corn flavor).
- ⅓ cup cotija or feta, crumbled.
- 1 large yellow or red onion, minced.
- 1 cup shredded Monterey Jack or cheddar.
- 2 red and/or orange bell peppers, diced.
- Juice of ½ lime.
- 2 1/2 cups of low sodium chicken broth.
- 1-1.5 (15.25 oz) cans corn, drained or 1 ½ cups frozen corn.
- 4 garlic cloves, minced.
- 2 tsp chili powder.
- ½ tsp garlic powder.
- ½ tsp salt.
- ½ tsp smoked paprika.
- 1 (4 oz) can diced green chiles, optional.
- Toppings: drizzle with plain Greek yogurt, more Cotija cheese, Tajín seasoning, cilantro, hot honey, avocado.
Directions
- Preheat the oven to 400°F.
- Prep ingredients: dice onions and bell peppers into very small, bite-sized pieces. Mince the garlic. Dice chicken into small cubes.
- To a 9 x 13 baking dish, add uncooked rice, onion, bell peppers, corn, and raw chicken.
- In a bowl, whisk together the chicken broth, minced garlic, chilies (if using), and spices. Pour mixture as evenly as possible over the casserole ingredients.
- Gently stir together, ensuring that the rice is fully submerged in the broth. If not, gently press ingredients down with a spoon or add 2–4 more tablespoons of broth as needed.
- Sprinkle with the cotija cheese.
- Cover tightly with foil and bake 60–70 minutes, until chicken reaches at least 150°F AND rice is tender (no firm center). Tip: Every oven is different. If the rice still has a slight bite at 60 minutes, recover and bake an additional 10–15 minutes.
- Remove foil, stir in the Greek yogurt and lime juice, sprinkle Monterey Jack over the top, and bake 10–15 more minutes until melted and bubbly. Optional (but highly recommended): broil for 1–2 minutes for crispy edges. Chicken should be 165°F at this point.
- Rest 10 minutes before serving. The rice thickens and absorbs the last bit of moisture during this time.
- Garnish with cilantro, cotija, Tajín, or any toppings you love. Even a drizzle of hot sauce tastes amazing!
For the full recipe + nutritional information + tips for success, CLICK HERE.
One Pan Cheeseburger Quinoa Casserole
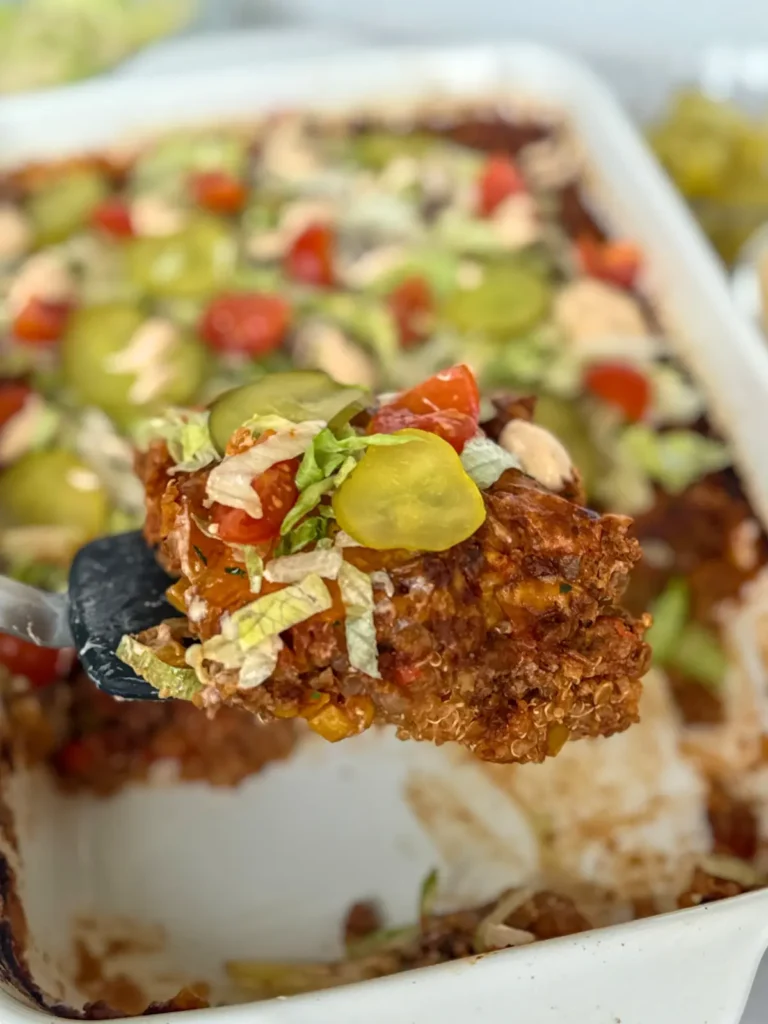
A filling, well-balanced cheeseburger inspired casserole with a sneaky fiber boost: adding a can of lentils! They blend right in, keep the texture hearty, and add extra fiber, plant-based protein, and budget-friendly volume without relying on more meat.
It is all about the toppings with this one – I love to add shredded lettuce, pickles, and fresh tomatoes with a Greek yogurt Big Mac sauce. Click on the title to get the full recipe!
Hope you enjoyed these easy dinner ideas! Subscribe and receive a free 33-page e-book and infrequent updates to prioritize your health!