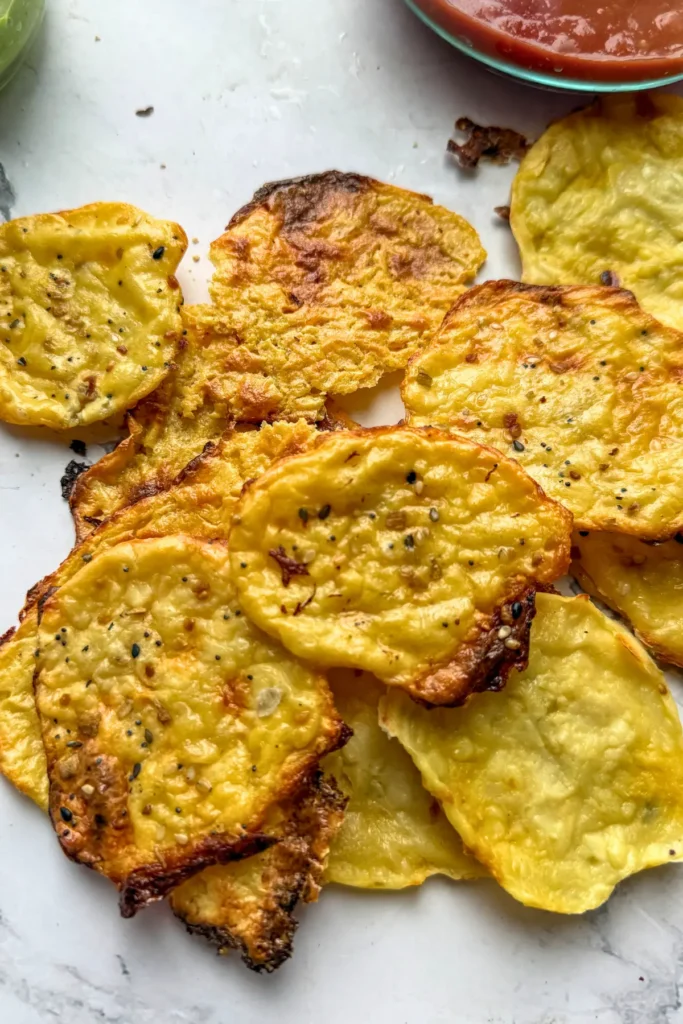
These crispy cottage cheese chips with nutritional yeast are the most delicious savory snack with some extra protein! If you love a salty potato chip, these are a much healthier alternative with 3 grams of protein per “chip”. {Gluten-Free}
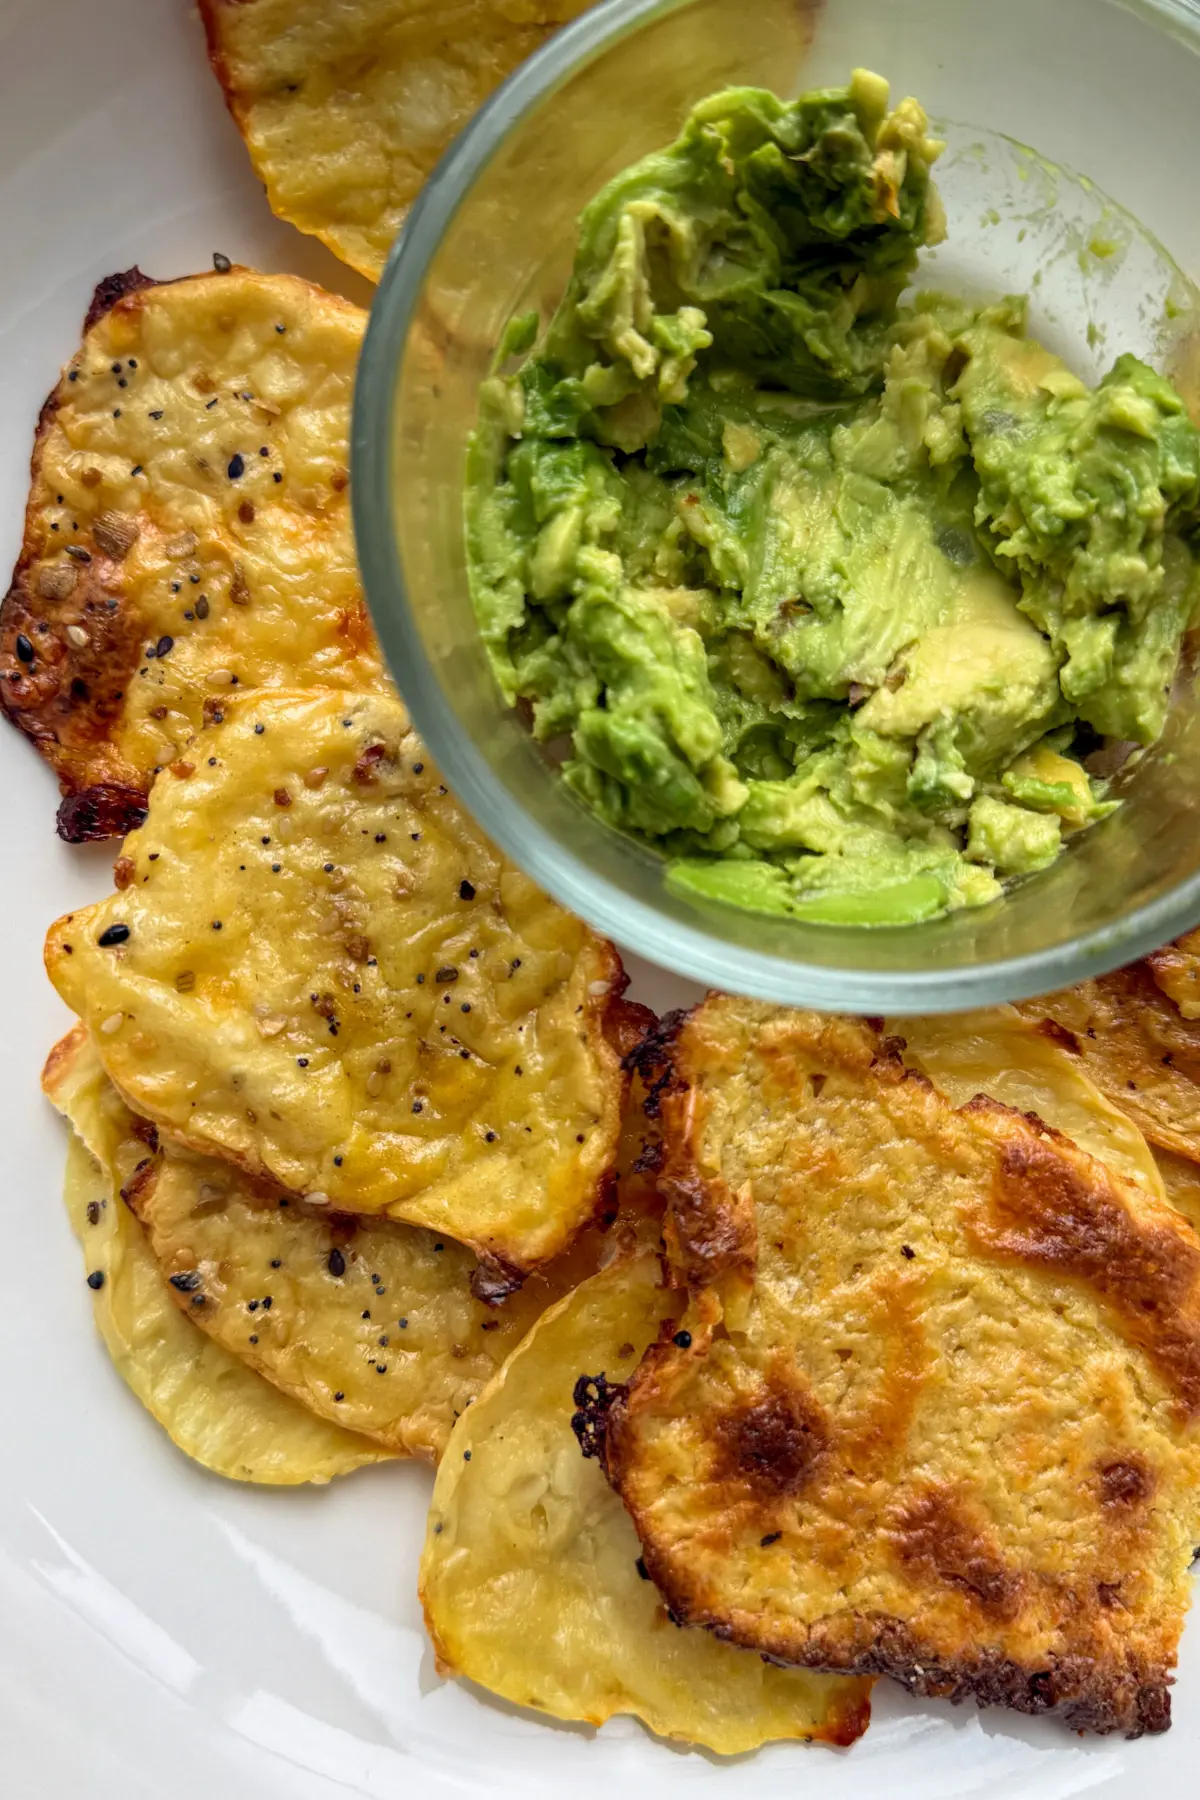
These cottage cheese chips are just 3 ingredients, super fun, and so tasty! I love to dip them in guacamole.
Why add nutritional yeast? Nutritional yeast is a vegan cheese substitute with a parmesan cheese-like flavor. Just one tablespoon of Simple Truth Organic nutritional yeast has 3 grams of protein and is packed with B vitamins and folate.
These chips are making the rounds on TikTok but can be a little bit tricky. I’ve developed this recipe so it’s foolproof and you won’t be wasting a lot of cottage cheese. If you have an air fryer, they will even crisp up the next day.
So, the next time you’re craving a bag of chips while you’re watching TV- make these instead!

Why I Love These Cottage Cheese Chips
- It’s just three ingredients.
- They’re so fun and delicious! These are good on their own but since the flavor profile is so mild they can be dipped in just about anything. I love to eat them with aioli or guacamole!
- Healthy, high protein snack. This entire recipe (12 large chips total) is just 225 calories and 35 grams of protein! Plus, a good source of calcium, folate, and B vitamins. I love to snack and these offer so much more than just salty goodness.

Ingredients

Tips for Success -> Must Read
I am not gonna lie – getting the perfect cottage cheese crisp is tricky! These tips will ensure you aren’t throwing out your crisps after baking. However, I have now included a microwave option which might be even better!
- Don’t use fat free cottage cheese. I recommend 2% milkfat or higher. Good Culture and Daisy cottage cheese work well.
- Spread the mixture evenly. Try to make sure every crisp is about the same thickness for even cooking. The mixture should be thin but not where you can see the parchment paper.
- Space the crisps out. There should be at least an inch in between each crisp so they don’t run together too much.
- Let them cool completely. They crisp up more as they cool, so don’t judge their final texture straight out of the oven.
Cottage Cheese Crisps Directions
This recipe makes about 10-12 chips. I recommend using two cookie sheets or making two batches so they are not too close to one another.
I added a lot of details to these instructions because cooking times and oven times will vary – and I want to ensure your success! It seems a lot more complicated that it really is.


Step-By-Step Instructions
- Preheat the oven to 350 degrees F.
- Add cottage cheese and nutritional yeast to a high speed blender (I used a Nutri-Bullet). Stir it together prior to blending. Blend until almost smooth – doesn’t have to be completely whipped just enough to create a flatter mixture on the sheet pan. Add a tablespoon or two of water if the blender gets stuck.
- Using a tablespoon or small spoon, add a spoonful of the cottage cheese mixture on a cookie sheet lined with parchment paper. Spread out the mixture using the back of the spoon so it’s about 1/8 inch thick – thin but not thin enough to see the parchment paper.
- Repeat this process keeping about a 1 1/2 inch distance between each one. The key is to make sure all of the rounds are the same thickness, relatively even, and spread apart.
- Sprinkle on Everything but the Bagel Seasoning. Be careful not to add too much because the chips will be very salty.
- Bake for 30 minutes, then check for doneness. The crisps should be starting to turn golden around the edges. If they still look pale or wet, continue baking in 5–10 minute increments. If the tops are still soft after about 40 minutes, carefully flip and continue baking for another 10–15 minutes to help them dry out. Note: Bake time can vary quite a bit depending on the moisture in your cottage cheese and how thick they are. Some batches may take up to 45–55 minutes.
- They are done when: the edges are golden brown, the surface no longer looks glossy, they feel set (not wet). If some are done before others, remove them from the pan and continue baking the rest.
- Let them rest out of the oven for at least 10 minutes. They are best if eaten the day you made them.
Scroll for the microwave version!
To store: place in an airtight container with a paper towel to absorb moisture. Store at room temperature for up to 5 days. To reheat: I recommend air frying for 2-4 minutes at 300 degrees F! stored in an airtight container for up to 5 days at room temperature.
Microwave Version
Still blend and spread them out on parchment paper, then follow the directions below.
- Microwave on 50–70% power for 3–4 minutes.
- Then continue in 30-second increments until:
- edges look golden.
- centers look dry (not glossy).
- Let them sit (this is key).
- Rest for 2–5 minutes before touching—they crisp as they cool.
- Carefully peel off parchment and eat right away.
Why Your Cottage Cheese Crisps Aren’t Crispy (and How to Fix Them)
If your cottage cheese crisps aren’t turning out quite right, don’t worry – this recipe can be a little finicky depending on moisture and thickness.
I tested these multiple times, and honestly – this is one of those recipes that doesn’t always cook exactly the same every time. Here’s how to troubleshoot it
Here are a few quick fixes:
They’re still soft after 30 minutes.
Totally normal. Keep baking in 5–10 minute increments. Some batches can take up to 45–55 minutes depending on the moisture content.
They look wet or glossy.
They need more time. Crisps won’t firm up until that moisture cooks off and the edges start to turn golden brown.
The tops are soft but bottoms are browning.
Flip them and bake another 10–15 minutes. This helps dry out the other side.
They never got crispy.
They were likely too thick. Make sure to spread them very thin (about 1/8 inch).
They taste too salty.
Go lighter on the Everything but the Bagel seasoning—especially since cottage cheese already has sodium.
They’re soft right out of the oven.
Let them cool for at least 10 minutes. They continue to crisp up as they rest.

If you want them super crispy, you might have to deal with burnt edges on some of them. It’s tricky business! The burnt edges can be cut off.
Just a note: these smell a little funky as they are cooking – this is due to the nutritional yeast. I promise – they taste amazing! Trust the process because these are such a nutritious snack that really satisfies that potato chip craving.
Dip Ideas & Variations
Since these crisps basically taste like a cheesy, salty chip, most dips complement them well.
- Greek yogurt ranch.
- Guacamole
- Hummus
- Salsa
- Honey mustard
- Chipotle mayo
- Basically, anything you would want to dip a chip into!


Cottage Cheese Crisps with Nutritional Yeast
Ingredients
- 1 cup 2% cottage cheese (or higher milkfat) Good Culture or Daisy Brand recommended
- 2 tablespoons nutritional yeast seasoning or preferred cheese
- Everything but the Bagel Seasoning for garnish
Method
- Preheat the oven to 350 degrees F. This recipe makes 12 crisps and you may need two batches or two cookie sheets.
- Add cottage cheese and nutritional yeast to a high speed blender (I used a Nutri-Bullet). Blend until almost smooth – doesn't have to be completely whipped just enough to create a flatter mixture on the sheet pan. Add about a tablespoon or two of water if the blender gets stuck.
- Using a tablespoon or small spoon, add a spoonful of the cottage cheese mixture on a cookie sheet lined with parchment paper. Spread out the mixture using the back of the spoon so it's about 1/8 inch thick – thin but not thin enough to see the parchment paper.
- Sprinkle on Everything but the Bagel Seasoning. Be careful not to add too much because the chips will be very salty.
- Bake for 30 minutes, then check for doneness. The crisps should be starting to turn golden around the edges. If they still look pale or wet, continue baking in 5–10 minute increments. If the tops are still soft after about 40 minutes, carefully flip and continue baking for another 10–15 minutes to help them dry out. Note: Bake time can vary quite a bit depending on the moisture in your cottage cheese and how thick they are. Some batches may take up to 45–55 minutes.
- They are done when the edges start to look golden brown/almost burnt. If some are done before others, remove them from the pan and continue baking the rest.
- Let them rest out of the oven for at least 10 minutes. They are best if eaten the day you made them. However, see details below.To store: place in an airtight container with a paper towel to absorb moisture. Store at room temperature for up to 5 days. To reheat: I recommend air frying for 2-4 minutes at 300 degrees F! stored in an airtight container for up to 5 days at room temperature.
- Still complete the first 4 steps. Microwave on 50–70% power for 3–4 minutes. Then continue in 30-second increments until:edges look golden.centers look dry (not glossy). Let them sit (this is key). Rest for 2–5 minutes before touching—they crisp as they cool. Carefully peel off parchment and eat right away.
Notes
- Oven time may vary – everyone’s oven is different.
- They are very mild in flavor and can be dipped into so many things: hummus, guacamole, salsa, Greek yogurt ranch for more protein, aioli – the sky is the limit!
- For a really crispy chip, I recommend waiting to take them out just as the edges are turning brown – almost burning. You can always cut off the burnt edges.